C-FIX REPAIR
Allows you to
REPAIR, RESIZE, REPOSITION and REINFORCE
damaged downlighter cut outs in ceilings.
A simple yet effective downlighter cut out ceiling repair kit. Made from fire resistant (euro class B) MDF with a galvanised steel band liner and fixed with screws and structural filler, the repair kit allows you not only to repair but to reposition and resize downlighter cut outs (allowing you the option of exchanging larger dated fittings for new smaller modern fittings) as well as reinforcing them to prevent further damage. Crucially the repair kit requires no access to the ceiling space, its patented design allows it to be manoeuvred through the cut out and fitted inside the ceiling leaving it invisible from below. Until now the only solution for downlighter cut out ceiling repair was to replace sections of ceiling or in some cases to replace the entire ceiling. It is suitable for plasterboard ceilings up to 15mm thick and comes in a range of standard sizes.
Available in sizes: 60mm, 65mm, 70mm, 75mm, 80mm, 85mm, 90mm


INSTRUCTION - VIDEOS
INSTRUCTION - STEP BY STEP
 |
 |
 |
|
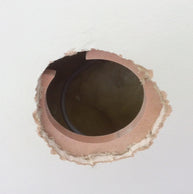
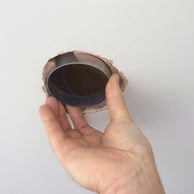
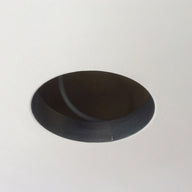
STEP 1 Turn off the power supply and ensure the working area is safe. Remove existing downlighter and ensure all wires and insulation are clear and that the area is clean and dust free. Using a rolling motion pass the Fire Resistant MDF Collar through the damaged cut-out. |
STEP 2 Position the Collar into place ensuring the bevelled edge is facing upwards.
|
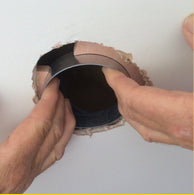
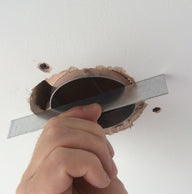
STEP 3 Squeeze the band so that the ends slightly overlap and insert inside the Collar. Position the join / overlap in the Band so it is opposite the opening in the Collar.
|
 |
 |
 |
|
STEP 4 Expand the Band inside the Collar using both hands until it "clicks" and no longer overlaps. THIS MUST BE DONE BEFORE STEP 5. |
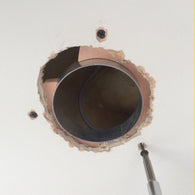
STEP 5 Choose 3 screws appropriate to the ceiling thickness (we supply a choice of 20 mm or 25 mm screws) and fix through the plasterboard into the Collar to hold it in position.
|
STEP 6 Adjust the depth of the Band inside the Collar so that it is flush with the ceiling.
|
 |
 |
|
|
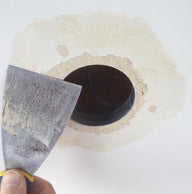
STEP 7 Fill the damaged area (use STRUCTURAL FILLER e.g. One Coat Plaster) If necessary remove extra plasterboard from around the cut out before filing so that the FILLER HAS GOOD CONTACT ALL AROUND THE BAND. |
STEP 8 Finish and paint the area as required. Install downlighter as per manufacturers instructions.
|
|